

Care and Maintenance of Wild Apple Trees in Vermont
Care and Maintenance of Wild Apple Trees in Vermont
Author:Paul Harwood | Organization:Consulting Forester | Date:January 1, 2015
The Care and Maintenance of Wild Apple Trees in Vermont
In 1900, Vermont was about 75% open farm land and only about 25% forest. Since then, the percentages have reversed and Vermont is now about 75% forest land. During that transition period, thousands of acres of open farm land reverted, through a process known as “forest succession”, into a forested condition. As could be expected, wild apple trees were established through the “dropping” of seeds by wildlife that fed on the apples around homes and farms and the trees became commonplace within the young pioneer forests in Vermont. Today it is quite common to find these hardy individuals struggling to retain their place in the forest and along the edges of open and semi-open lands. Many have succumbed to competition from taller forest trees that have robbed the young apple trees of the sunlight they require. (Download PDF here)
Wild apple trees are a very important part of the seasonal food supply of many species of wildlife here. In fact, most species of upland mammals and birds make use of apple trees at some point during their lives. Many animals feed on the apples themselves while others feed on the animals or insects that are attracted to the trees or fruit. They act as a seasonal “magnet” for increased wildlife activity!
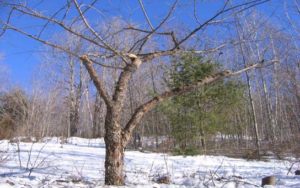
By nature, apple trees are short and require abundant sunshine. However, wild apple trees are most often competing for sunlight with taller forest trees like maple, ash, pine and poplar. You will have to look hard to find these “buried treasures” in your woodlot. After thoroughly investigating the woodlands of your property and having identified surviving apple trees, you will need to evaluate their potential to respond to your efforts. Look for trees that show evidence of a fair amount of live wood and branches with green leaves during the summer months. Most trees will have a lot of dead branches in their crowns so this evaluation is not always easy. With differently colored flagging tape, mark the trees with the best potential for saving, then those that are questionable, and finally those with little to no chance to respond. Begin your efforts on the “best” trees and spend your time and labor accordingly on the remainder.
Whenever possible, I like to do most of my work in and around apple trees during the dormant season, which in Vermont is October through early April. This reduces the risk of damaging tender leaves and twigs. Releasing involves removing trees that may be competing with the apple tree for available sunlight. Begin by cutting trees that are growing within 15-20 feet of the live crown of the chosen apple tree, focusing on a greater distance on the southern side. The idea is to create a condition where sunlight can easily reach the leaves of the apple tree during the summer months. Smaller stems should be cut close to the ground while large trees can be “girdled” to eliminate the ability of the tree to move water or nutrients, thus killing the stem. Girdling is accomplished by cutting a continuous ring (two rings are even more effective) through the bark with a saw or axe. To benefit a variety of wildlife species, I like to pile the brush nearby providing temporary shelter and homes for small mammals and birds. Next, cut the dead branches from the apple tree so that the living branches will have adequate space to grow and develop.
After you have successfully released your trees, it is time to begin pruning (remember, this may occur in stages of 1-3 years after releasing). Pruning involves the removal of certain live branches or portions of branches to enhance health, form and fruit production. If there is more than one living stem select the largest, straightest, healthiest stem and remove all others. If the tree is very tall and spindly as a result of “reaching” for sunlight, the removal of competition can result in the tree breaking off or bending over with the first winter snows. With such trees, I recommend shortening them by cutting off the top above a healthy live branch to bring the overall height down to where breaking or bending is less likely. A certain common sense judgment is required here! For trees that have been in the shade of competitors for many years, this is all that I suggest doing the first year or two. Let them adjust gradually to the change.
Plan to visit the released trees during the summer months to evaluate their response to your improvement efforts. If they appear to be developing a fuller crown of leaves and branches, (don’t worry about increased fruiting at this point), then you probably have a keeper. Some of the less robust stems may die, but don’t despair. They probably would have died anyway!
Removing live branches results in an injury to the tree so it is important to follow certain guidelines to reduce the negative impacts of this wounding. First, pruning should be done only in the dormant season (October-April) when the stems are not actively growing and spores from infectious diseases are less prevalent. The wounds should be dried up and less receptive to disease establishment by the time the spores return during the spring or summer. Second, use a sharp, clean hand saw or pruner and avoid ragged, split cuts. When cutting live branches, avoid using a chainsaw whenever possible as they tend to leave ragged, rough cuts and it’s harder to control chainsaws for accurate cuts. Third, when removing entire branches, cut the branch parallel to, and just beyond, the branch collar (see Fig. 3). Cutting into the branch collar increases the chance of infection and decay. And finally, when removing a portion of a branch, cut at a diagonal (somewhat parallel to the remaining branch) just beyond a healthy branch fork or bud (see Fig. 4)
Strive to remove no more than 30%-40% of the live crown of your tree each time it’s pruned. Focus on opening up thick clusters of branches, removing “crossed” branches and creating a wider, well-balanced crown shape. A full crop of apples is heavy, so prune to keep the crown balanced from side to side and avoid creating a one-sided or lop-sided crown. Remove all “suckers” which are the vigorous, vertical sprouts that typically form along the top of live branches after they have been released. Suckers do not produce fruit and tend to rob otherwise desirable stems of available nutrition and sunlight. Remove branches that are tending to grow straight up and thus unduly increasing the height of the tree. Shorter, wider trees are better able to support the weight of a good fruit year and are less likely to be toppled during high wind or heavy snow events. Be careful during pruning as it is easy to remove more than the 30-40% guideline! If the tree needs more pruning after you have reached 30-40% removal, spread the remainder out over the next few seasons. Have patience! It takes time to develop a good tree from one that has been neglected for so many years.
Once released and pruned, I like to visit the tree about every other winter for additional pruning to enhance the form and vigor and to remove any suckers that might have developed. This is the time when “refined” pruning should take place and might involve removing the last 1-2 feet of some of the lower, vigorous branches. This tends to increase fruit production further back on the branch where the tree can better support heavy fruit. Noticeable improvements in fruit production might not begin until two to three years after releasing on better trees and even longer on marginal trees.
I encourage the use of lime and fertilizer to increase fruit production and invigorate the development of the tree. Lime should be applied soon after releasing/pruning the tree as it takes a couple years to be absorbed into the soil. Lime raises the pH and makes soil nutrients more available to the roots. Broadcast a 50-pound bag around each tree out to about 15-20 feet from the trunk. I try to begin fertilizing during the second or third year after release and after the lime has had a chance to be absorbed into the soil. Fertilizing should occur in the spring after the ground thaws and not during the summer months. As a general rule, I don’t fertilize trees after June 1. Liquid or dry fertilizer of calcium nitrate, ammonium nitrate, or a balanced 10-10-10 commercial mixture can be applied out to the drip-line of the crown.
I recommend two to three pounds per year for small to medium-sized trees and five to eight pounds for larger trees. I don’t like to drill holes in the soil or use fertilizer spikes as these can injure roots and often put the fertilizer beneath the fine root hairs that are located near the surface. These root hairs are responsible for the majority of nutrient uptake.
If you are fortunate enough to have an abundance of wild apple trees in your woodlands, try to select for a range of varieties. Wild apple trees hybridize readily and you are sure to have many varieties with a range of fruiting characteristics. Select for apples that stay on the tree well into the winter as they provide a lasting food source for wildlife. Early ripening varieties are equally important as they allow animals a longer period of time in which to build necessary fat reserves for the upcoming winter. Remember, fruit that is not at all appealing to you might well be considered gourmet dining to deer, bear or turkeys.
Though very rewarding, the improvement of wild apple trees can be labor intensive and somewhat expensive. There may be federal or state cost-share programs available to help offset the out-of-pocket expenses of wild apple tree work. Check with your County Forester or State Wildlife Biologist for the availability of these programs and to learn about the application procedures.
Wild apple trees that are well-tended can significantly enhance the quality of wildlife habitats within your woodland. Take the time to locate and identify these hidden treasures and begin the process of releasing and pruning. The rewards to both you and the wildlife populations in your neighborhood will be worth your efforts. Remember to take “before and after” pictures to document the dramatic effects of your efforts.
Recommended Tools:
- Small chainsaw (helpful but not necessary).
- Hand pruning saw (the specialized, curved type (10”-16” long) is very useful, but a small bow/buck saw also works well). Always use sharp saws!
- Hand pruner (a sharp bypass pruner is much better than the anvil type)
- Pole pruner (very helpful for reaching the upper portion of the tree. The type with interchangeable pruner/saw head works well).
- Ladder (may be helpful for reaching into the crowns of larger trees. Never use a stepladder as they are not stable and could lead to dangerous falls).